Exploring origami tessellation and the art of geometric paper folding.
Reverse engineering tessellations, folding crease patterns and inventing new origami tessellations.
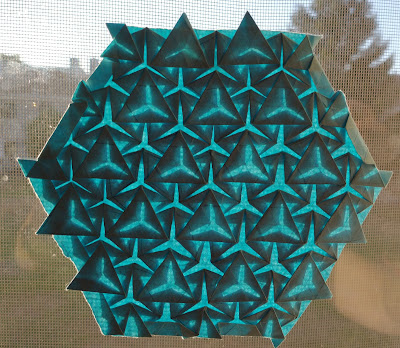
Fractal Origami Tessellation
Get link
Facebook
Twitter
Pinterest
Email
Other Apps
-
This is a variation on the Robin Scholz swarm tessellation. A central hex and then rhombuses and triangles.
This is a tessellation by Arseniy K that I solved and reproduced. There wasn't too much solving involved as front and back photos were available. Once I figured out the starting point it was smooth sailing from there. At first glance it looks like a typical small hex twist at the center, but it's not. You need a different method to achieve those overlaps that show up on the front. My crease pattern, which is at the bottom of this post, shows how it works I gave it a name for the purposes of this post, but I don't think he ever named it.
A few posts back I showcased the "Merry Go Rounds" origami tessellation ". This post and its images are the same exact tessellation with some of the folds rearranged. It offers a completely different final product. The actual structure is basically identical. However, we orient the finished folds in a different configuration and wind up with something unique unto itself. It's pretty cool that two such similar executions can yield such wildly different results. Just another wonderful secret to discover in the folding of origami tessellations. No doubt, there are many such instances of this phenomenon in other designs. If you're interested in the crease pattern just follow the link at the top of this post to the first incarnation of Merry Go Rounds.
This tessellation builds upon others that use the same beginning foundation. As with most origami tessellations, it then finds a new direction to go from that common starting point. When I first thought of it, I wasn't really clear on if it would work. But it looked good on paper, so I forged ahead. I was actually a little confused as to how the gaps between the triple intersections would work. But when I actually went to fold the other components it became much clearer. The reverse side shows what it has in common with other tessellations. It starts with open back hexagons with some standard flaps. But on the front side there are the bullet shapes to change things. The rest of the details can be seen in the crease pattern that I've included at the end of this post. There's a sketch of different tess in the bottom left corner of the crease pattern. It does not pertain to this one.
Comments