
Wheels Origami Tessellation

This is a tessellation I attempted to recreate that I had found somewhere on the Internet. You can find lots of them, but many lack crease patterns or instructions on how to fold.
That's become a fun new aspect of my origami habit. Trying to figure out how to recreate tesses from their folded pics.

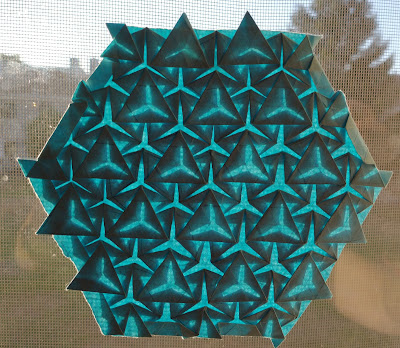
I really like how this one looks when I take the photo with back light, but no flash. This technique really brings out the structure of the folds. Giving a 3-D appearance to otherwise flat designs.
This is a flagstone of large open back hexagon twists on one side connected by their surrounding triangle twists on the other side.
That's become a fun new aspect of my origami habit. Trying to figure out how to recreate tesses from their folded pics.

I really like how this one looks when I take the photo with back light, but no flash. This technique really brings out the structure of the folds. Giving a 3-D appearance to otherwise flat designs.
This is a flagstone of large open back hexagon twists on one side connected by their surrounding triangle twists on the other side.
The second photo shows the reverse side of the same design.
The third photo is a very basic crease pattern I created on a smaller piece of paper with a much smaller grid. It's simple, but should be quite helpful to those familiar with this form of origami.
That's generally how I suss out the larger designs. Figure it on a smaller scale and then adapt it to the larger landscape.
 The final photo is the image I found on the Internet which inspired the reconstruction. I know they look like they've different tessellations. But they are the same. It's just the back light, paper type and the photography that differ.
If you're interested in attempting to fold this, it was relatively simple.
It is quite helpful to make sure that you fold the hexes on one side and the triangles on the opposite. It makes it that much easier to collapse the final design.


Comments